In this tutorial, we will explore what the Swagger library is and learn how to integrate it into a Spring Boot REST API application.
Swagger is an open-source framework that simplifies the design, documentation, and testing of REST APIs.
First, Swagger comes with a web-based tool that provides an interactive interface for API documentation and developers and users can test endpoints directly from the browser.
Furthermore, it provides clear details about requests and response formats, HTTP methods, and parameters and automatically generates useful documentation for your API endpoints.
Swagger Library makes it easier for other developers to understand and consume your API and there is no need for third-party tools like Postman for basic API testing.
Altogether, we can say that Swagger simplifies the API lifecycle, making it easier to design, document, test, integrate and maintain APIs.
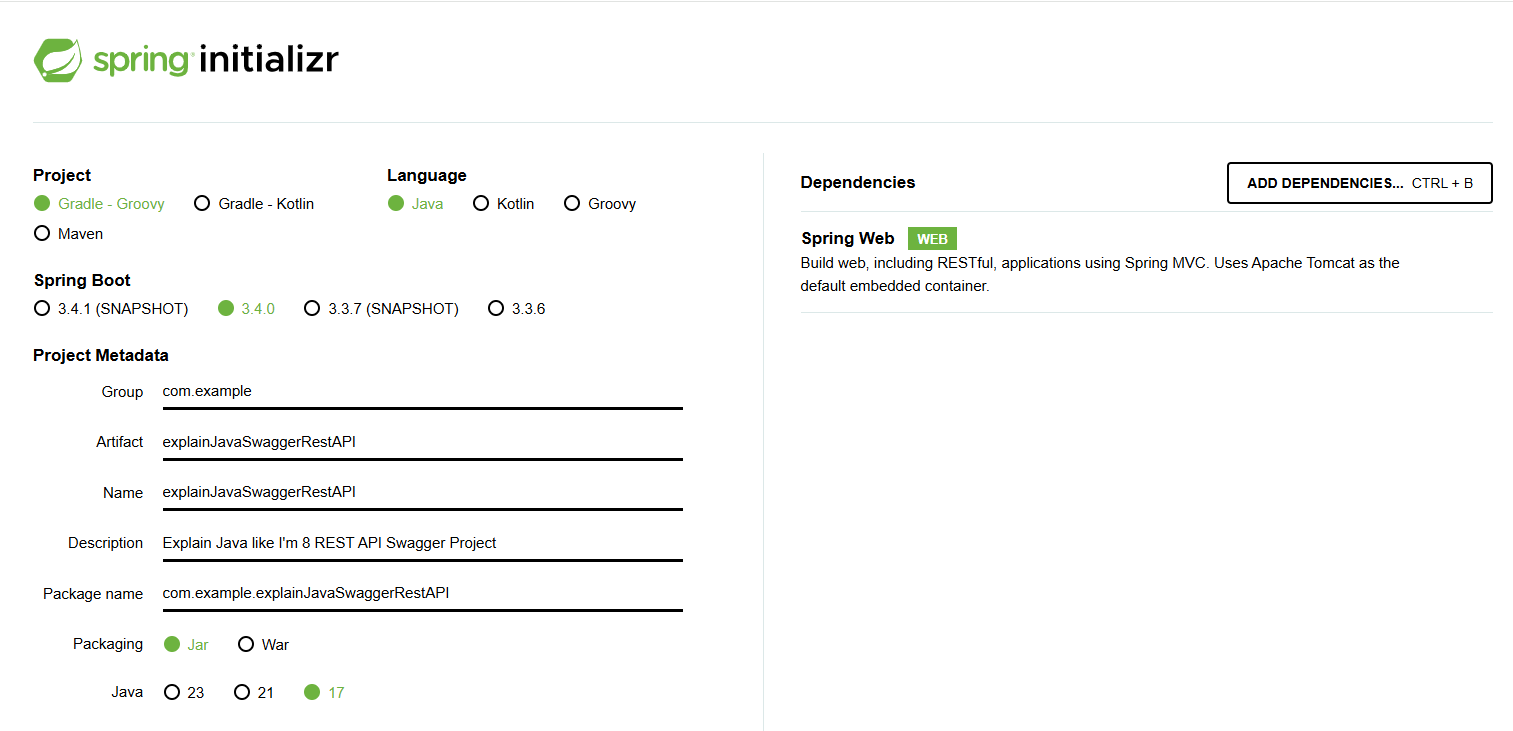
You can use Spring Initializr to quickly generate a Spring Boot project with Maven or Gradle. We can use the following configurations:
The next step is to add a dependency in the build.gradle file. We will use springdoc-openapi which is a java library that helps us to automate the generation of API documentation.
The main benefit of using this library is that It checks spring configurations, class structure and various annotations and no additional configuration is needed.
You can check the last version here.
					plugins {
	id 'java'
	id 'org.springframework.boot' version '3.4.0'
	id 'io.spring.dependency-management' version '1.1.6'
}

group = 'com.example'
version = '0.0.1-SNAPSHOT'

java {
	toolchain {
		languageVersion = JavaLanguageVersion.of(17)
	}
}

repositories {
	mavenCentral()
}

dependencies {
	// https://mvnrepository.com/artifact/org.springdoc/springdoc-openapi-starter-webmvc-ui
	implementation 'org.springdoc:springdoc-openapi-starter-webmvc-ui:2.7.0'

	implementation 'org.springframework.boot:spring-boot-starter-web'
	testImplementation 'org.springframework.boot:spring-boot-starter-test'
	testRuntimeOnly 'org.junit.platform:junit-platform-launcher'
}

tasks.named('test') {
	useJUnitPlatform()
}
Next we need to add some classes to create a basic REST API, similar to this tutorial.
					public class Lemonade {

    private Long id;
    private String name;
    private String description;

    public Lemonade() {
    }

    public Lemonade(Long id, String name, String description) {
        this.id = id;
        this.name = name;
        this.description = description;
    }

    public Long getId() {
        return id;
    }

    public void setId(Long id) {
        this.id = id;
    }

    public String getName() {
        return name;
    }

    public void setName(String name) {
        this.name = name;
    }

    public String getDescription() {
        return description;
    }

    public void setDescription(String description) {
        this.description = description;
    }
}
					@Repository
public class LemonadeRepository {

    private final Map<Long, Lemonade> lemonades = new HashMap<>();

    public Lemonade save(Lemonade user) {
        lemonades.put(user.getId(), user);
        return user;
    }

    public Lemonade update(Long id, Lemonade updatedLemonade) {
        if (lemonades.containsKey(id)) {
            updatedLemonade.setId(id);
            lemonades.put(id, updatedLemonade);
            return updatedLemonade;
        }

        return null;
    }

    public void deleteById(Long id) {
        lemonades.remove(id);
    }

    public List<Lemonade> findAll() {
        return new ArrayList<>(lemonades.values());
    }

    public Optional<Lemonade> findById(Long id) {
        return Optional.ofNullable(lemonades.get(id));
    }

}
					@Service
public class LemonadeService {

    @Autowired
    private LemonadeRepository lemonadeRepository;

    public Lemonade createLemonade(Lemonade lemonade) {
        return lemonadeRepository.save(lemonade);
    }

    public void deleteLemonade(Long id) {
        lemonadeRepository.deleteById(id);
    }

    public Lemonade updateLemonade(Long id, Lemonade updatedLemonade) {
        return lemonadeRepository.update(id, updatedLemonade);
    }

    public List<Lemonade> getAllLemonades() {
        return lemonadeRepository.findAll();
    }

    public Optional<Lemonade> getLemonadeById(Long id) {
        return lemonadeRepository.findById(id);
    }

}
					@RestController
@RequestMapping("/api/lemonades")
public class LemonadeController {

    @Autowired
    private LemonadeService lemonadeService;

    @GetMapping
    public List<Lemonade> getAllLemonades() {
        return lemonadeService.getAllLemonades();
    }

    @GetMapping("/{id}")
    public ResponseEntity<Lemonade> getLemonadeById(@PathVariable Long id) {
        return lemonadeService.getLemonadeById(id)
                .map(ResponseEntity::ok)
                .orElse(ResponseEntity.notFound().build());
    }

    @PostMapping
    public Lemonade createLemonade(@RequestBody Lemonade lemonade) {
        return lemonadeService.createLemonade(lemonade);
    }

    @PutMapping("/{id}")
    public ResponseEntity<Lemonade> updateLemonade(@PathVariable Long id, @RequestBody Lemonade updatedLemonade) {
        Lemonade lemonade = lemonadeService.updateLemonade(id, updatedLemonade);
        if (lemonade == null) {
            return ResponseEntity.notFound().build();
        }
        return ResponseEntity.ok(lemonade);
    }

    @DeleteMapping("/{id}")
    public ResponseEntity<Void> deleteLemonade(@PathVariable Long id) {
        lemonadeService.deleteLemonade(id);
        return ResponseEntity.noContent().build();
    }
}
Now, when we start our application we can browse our created endpoints on http://localhost:8080/swagger-ui/index.html

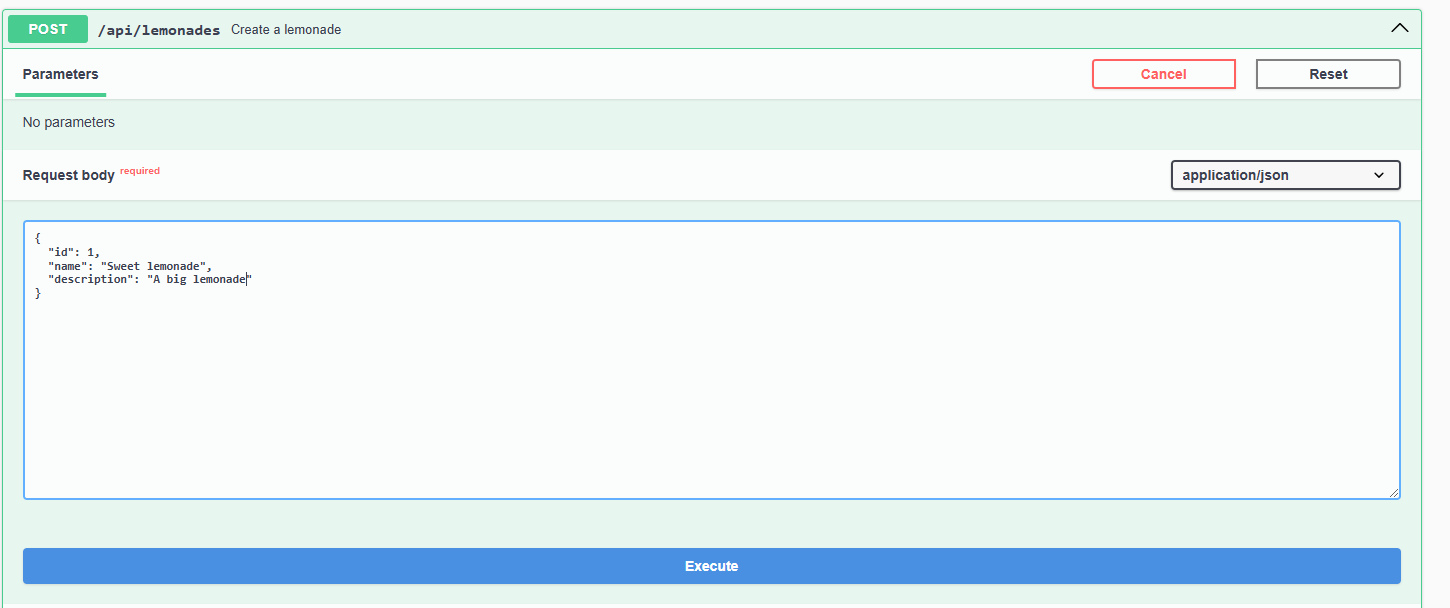
We can use Swagger UI for every defined operation. For instance, we can add a lemonade:
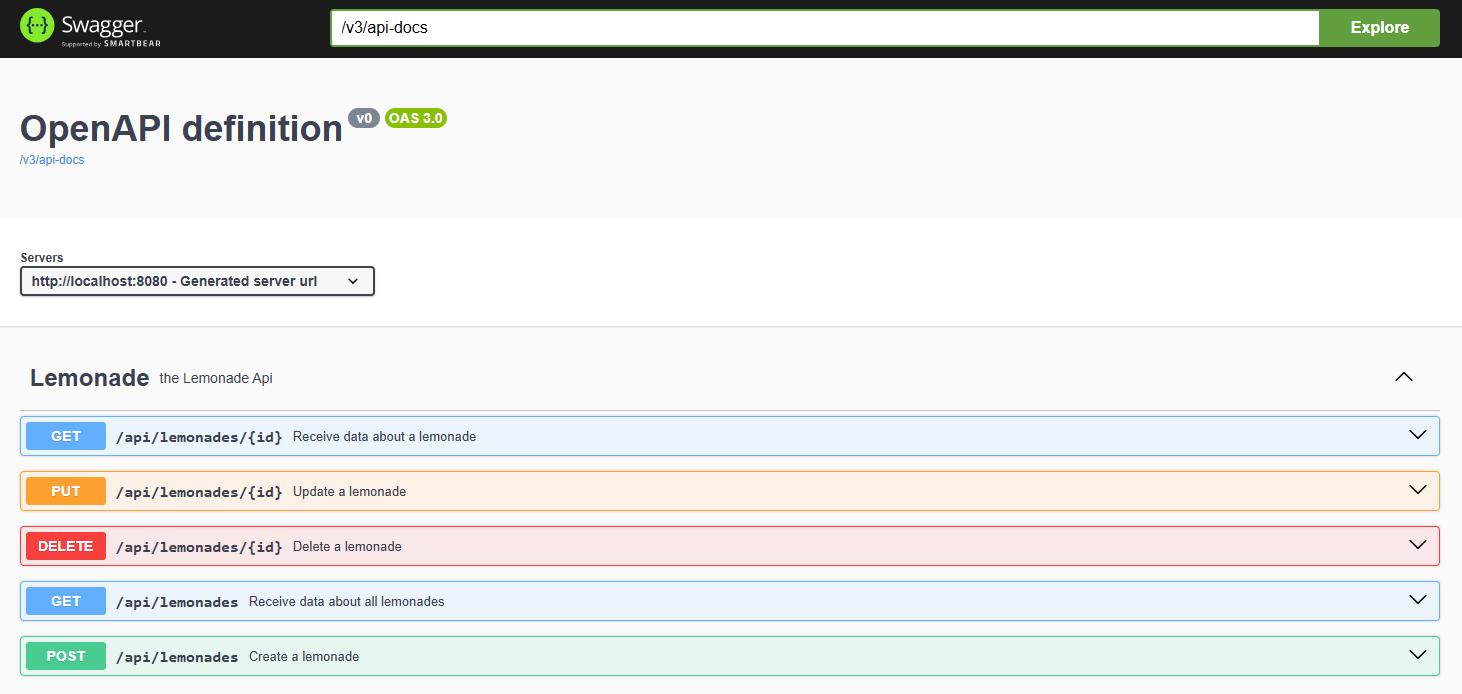
Additionally, we can add descriptions using @Tag or @Operation annotations to our methods to create some useful documentation for our API.
					@RestController
@RequestMapping("/api/lemonades")
@Tag(name = "Lemonade", description = "the Lemonade Api")
public class LemonadeController {

    @Autowired
    private LemonadeService lemonadeService;

    @GetMapping
    @Operation(summary = "Receive data about all lemonades")
    public List<Lemonade> getAllLemonades() {
        return lemonadeService.getAllLemonades();
    }

    ...


}
The final result will look like in the following image:
In this tutorial, we provided a brief introduction to the Swagger library, discussing what it is, why it is useful and popular. At the end, we discussed a practical example of its integration in our previously created REST API.
Learn advanced concepts, work on real-world projects, and fast-track your journey to becoming a proficient Java developer. Start now and unlock your full potential in the world of Java programming!
Start now and unlock your full potential in the world of Java programming!

The place where you can start your Java journey.
© All Rights Reserved.