This tutorial will guide you through GitHub, the leading version control platform, and demonstrate how to store your personal projects in repositories so they’re organized and ready to showcase whenever needed.
A good way to improve your developer skills and learn programming is to create projects. It improves your confidence in coding, it helps you to solve real-world problems, and it prepares you for future interviews.
When you are having an interview for an entry-level job or for an internship, you should talk about your project portfolio. You should feel confident to talk about your problems and your solutions.
In order to help you to build a portfolio, we recommend adding your projects to a git platform along with a short presentation.
Git is a version control system. Basically, it’s a tool that helps you track changes to files, especially code. It’s widely used in software development but can be useful for any project where you want to keep a history of changes.
What Git Does:
Git is widely used in developing software, and it gives you a good advantage in your career, if you already know how to use it.
GitHub is the most popular Git hosting platform. It is a cloud-based platform that hosts Git repositories. It lets you store your code online, track changes, collaborate with others, and even deploy projects.
In this tutorial we will show you how to create a GitHub account, how to create a repository and we will give you some tips about keeping your repositories clean and tidy.
First of all, you need to create an account here: https://github.com/signup. Don’t worry, it is completely free.
In this account you will upload all your projects and use it to show your portfolio.
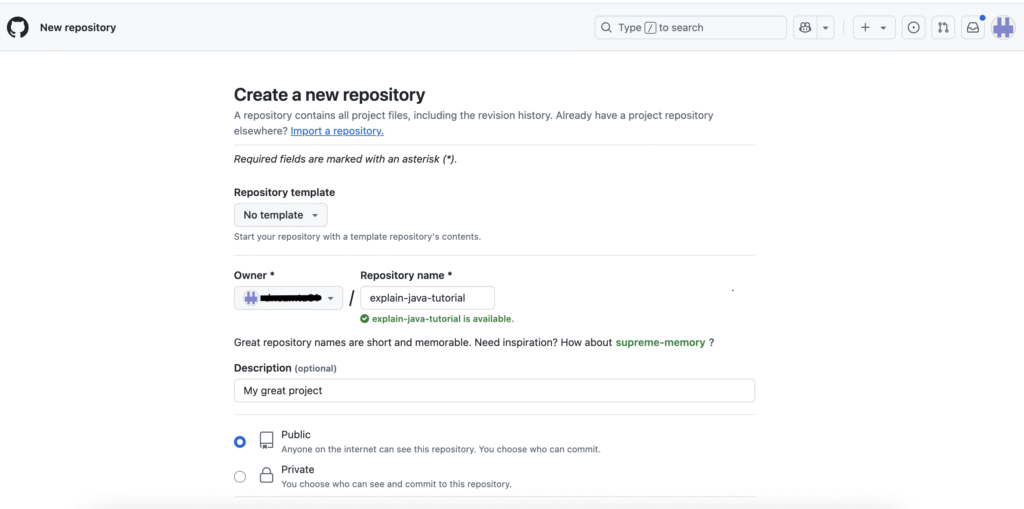
After you are logged in, you can enter on http://github.com/new to create a new repository. A Git repository (or repo, for short) is basically a digital folder that stores your project’s files along with their entire history of changes.
Then, you need to install git on your computer. Github prepared some tutorials for the installation which depends on your operating system: https://github.com/git-guides/install-git
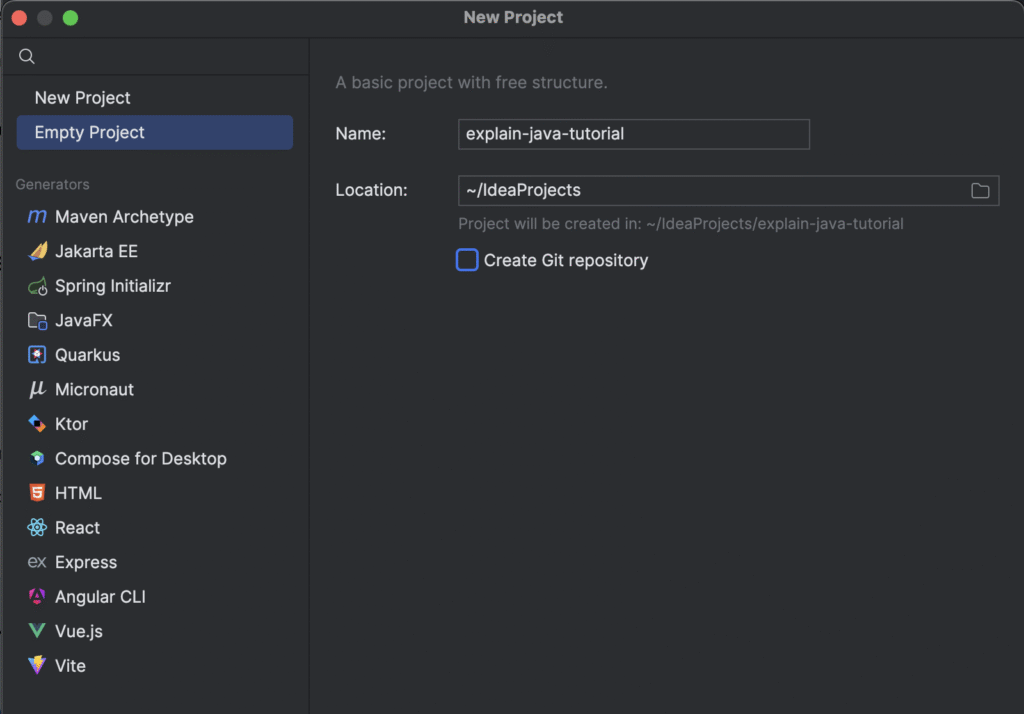
This tutorial was created using Intellij IDEA, which is a powerful, development environment primarily used for Java development. The Community Version is free and open-source.
Next, let’s create a new Java project to see how to connect it with your repository. In the project, we create the folder structure and a simple Main class. If you already have a project to upload, you can move to the next step.
The next step is to add two important files to your project: README.md and .gitignore.
First one is used to describe your project (we will complete it a little bit later), and the second one is to declare what files should be ignored.
The README.md file should be the place where you can describe your project:
					## Overview

This project demonstrates core OOP concepts in Java:
-  Classes & Objects
-  Encapsulation
-  Inheritance
-  Polymorphism
-  Basic simulation/game logic

Perfect for beginners learning how to apply OOP principles in a fun and interactive way!

---

## Project Structure
explain-java-tutorial
    ├── /src
       ├── /main
            ├── /java
               ├── /com
                    ├── /explainjava
                        ├── Main.java
│  README.md


## Getting Started

### Prerequisites
- Java 11 or newer
- A terminal or IDE (like IntelliJ, Eclipse, or VS Code)


### Running the App

Clone the repository and compile:

```bash
git clone https://github.com/yourusername/lemonade-stand.git
start Main.java
We don’t need to upload all the generated files from our project, so we need the add the following in the .gitignore file:
					*.class
/out/
/target/
/.idea/
/*.iml
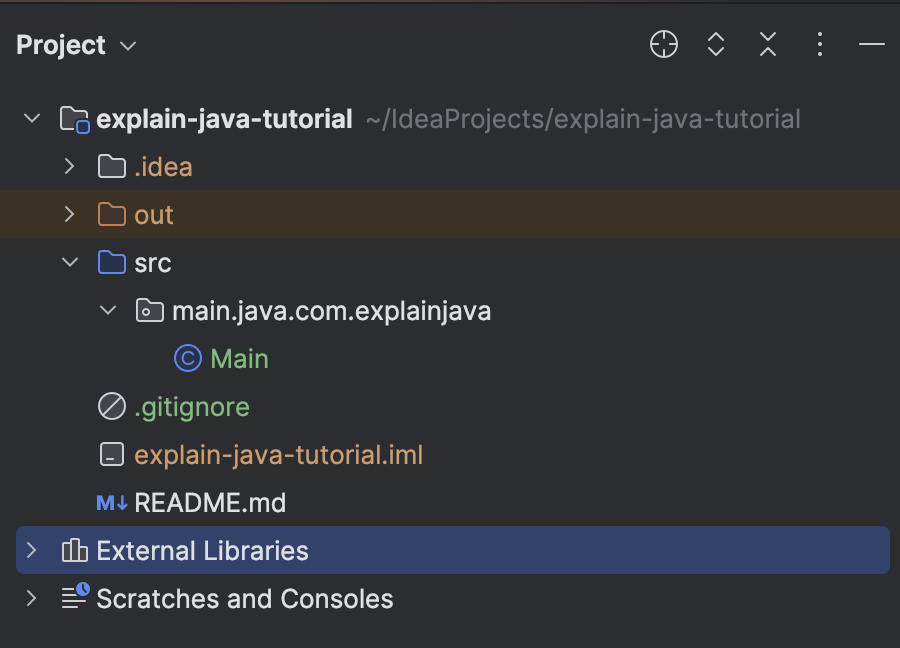
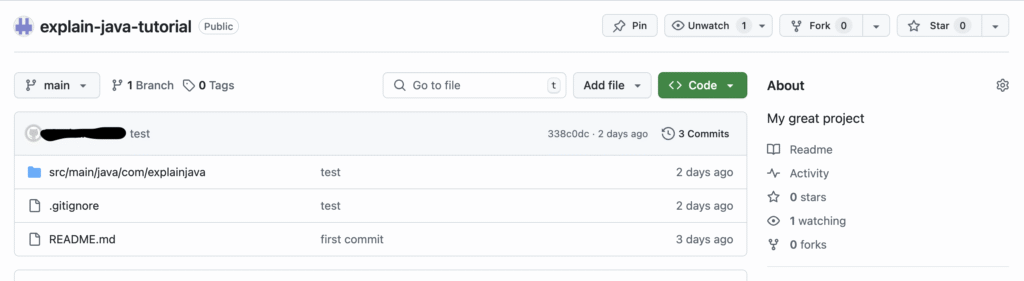
The structure of the project should look like this:
Next, we have two options: we use the terminal to write GIT commands or we use Intellij IDEA interface.
For the first option, we should open the terminal and copy and paste the following:
					git init
git add README.md
git add .gitignore
git add Main.java
git commit -m "first commit"
git branch -M main
git remote add origin https://github.com/youraccount/explain-java-tutorial.git
git push -u origin main
For the second one, we should use the GIT tab from our editor, in the same order:
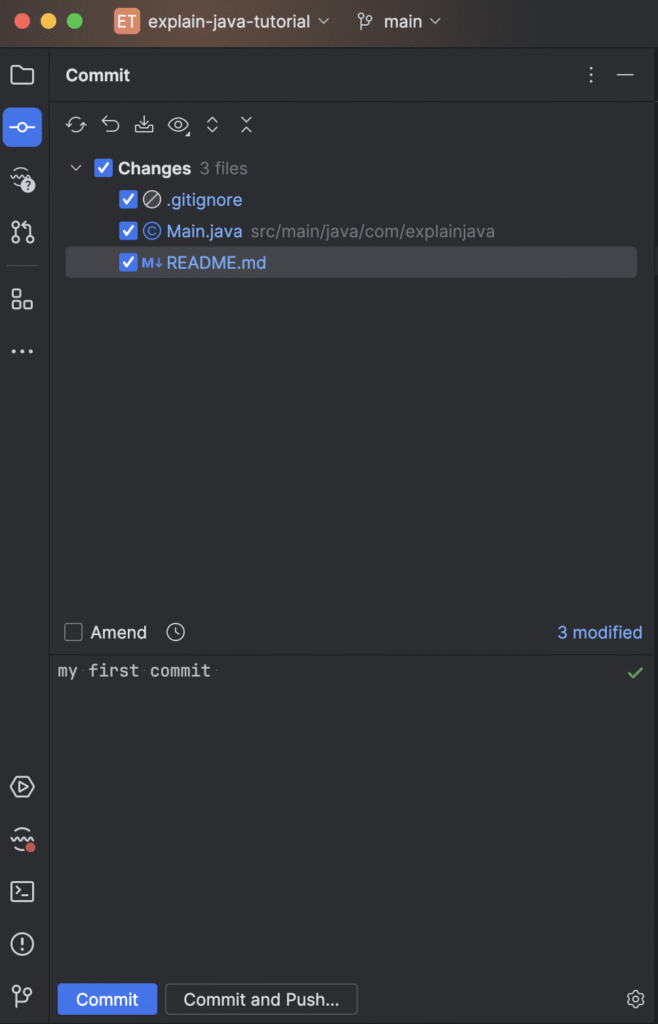
When pushed, you should see the files in your Github repository.
As a next step, you can explore more commands and get used with other Git principles. We prepared a cheat sheet for the most important commands:
| Explanation | Command |
|---|---|
|
Set Up |
git config –global user.name “Your Name” |
|
Start a Repository |
git init |
|
Track Changes |
git status # See changes |
|
Remote Sync (GitHub) |
git remote add origin <url> # Link to remote repo |
|
Branches |
git branch # List branches |
|
Fix mistakes |
git restore <file> # Undo changes to file |
Learn advanced concepts, work on real-world projects, and fast-track your journey to becoming a proficient Java developer. Start now and unlock your full potential in the world of Java programming!
Start now and unlock your full potential in the world of Java programming!

The place where you can start your Java journey.
© All Rights Reserved.