In this tutorial, we will create a simple REST API using Spring Boot and Spring Data. The database will be a MySQL database deployed in a Docker Container.
Spring Boot is a framework built on top of the Spring Framework that makes it easy to create standalone, production-grade Spring applications with minimal configuration. Similar to Spring Boot, Spring Data is a part of the ecosystem, and it’s designed to simplify data access and persistence in Java applications.
MySQL is an open-source relational database management system. It stores data in tables (rows and columns), and uses Structured Query Language (SQL) to manage and retrieve that data.
It’s one of the most popular databases in the world, especially used in web applications.
MySQL is a database server, and like any software, it must be installed or run on a system in order to manage data. You can install it directly on your computer, or you can use Docker to create a space especially for the server.
Docker is an open-source platform that makes it easier to build, ship, and run applications by using something called containers.
Think of containers like lightweight, portable virtual machines, but way faster and more efficient. Instead of running an entire operating system, a container just packages up your app and everything it needs (libraries, dependencies, code) so it can run consistently anywhere — whether that’s your laptop, a server, or the cloud.
More information about Docker and about the setup you can find here.
In this tutorial, we will learn how to create a simple REST API using these technologies.
You can use Spring Initializr to quickly generate a Spring Boot project with Maven or Gradle. We can use the following configurations:
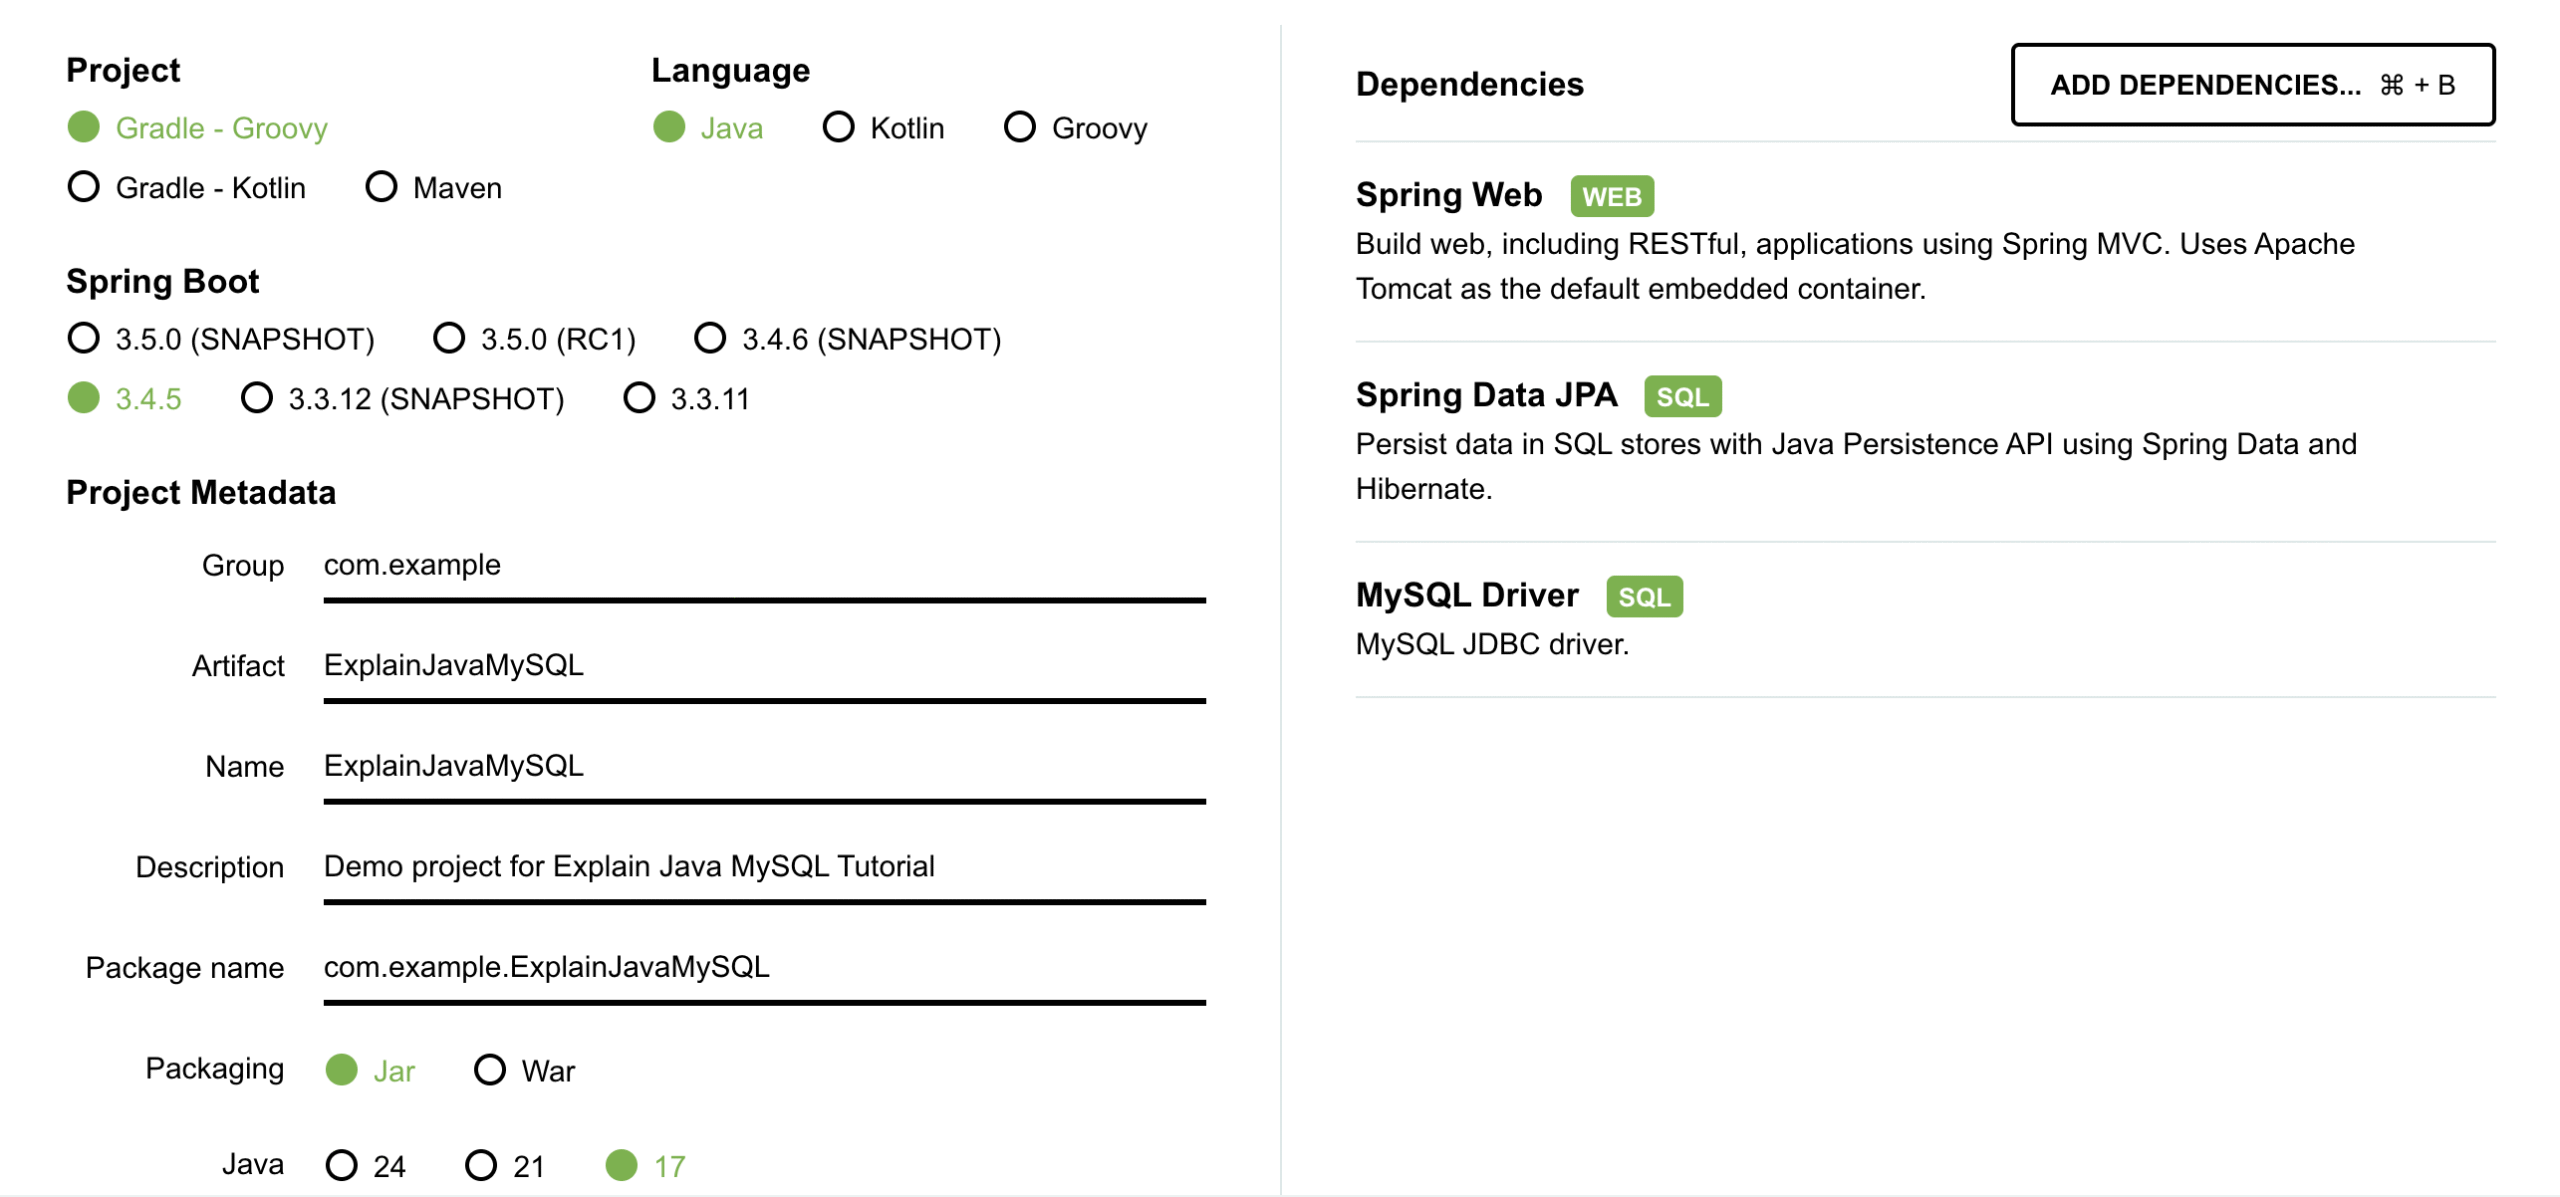
You will receive a ready-to-use project. All the configurations are already written in the build.gradle file and the start ExplainJavaMySqlApplication class is already created.
Additionally, we also have an already created structure in the resources folder and a test package.
As a first step, we should create a Docker Container in order to install a MySql database in it. For that, we need to create a docker-compose.yml file in the root of our project, and then, we need to call the command “docker-compose up –build” in the terminal to tell docker to install it. More information about Docker installation you can find here.
					version: '3.8'

services:
  mysql:
    image: mysql:8
    container_name: mysql-db
    restart: always
    environment:
      MYSQL_ROOT_PASSWORD: root
      MYSQL_DATABASE: demo_db
    ports:
      - "3306:3306"
    volumes:
      - mysql_data:/var/lib/mysql

volumes:
  mysql_data:
After we call docker-compose up –build command in the terminal, we should see the following response:
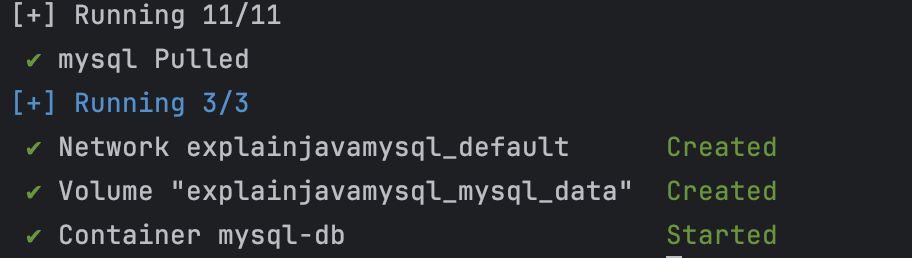
And we should see our database up and running:

In the next step, we need to tell Spring Data additional information about our database connection. For that, we need to add information in the application.properties file.
					spring.application.name=ExplainJavaMySQL

spring.datasource.url=jdbc:mysql://localhost:3306/demo_db
spring.datasource.username=root
spring.datasource.password=root
spring.jpa.hibernate.ddl-auto=update
spring.jpa.show-sql=true
spring.jpa.properties.hibernate.dialect=org.hibernate.dialect.MySQLDialect
Through this file, we define the connection URL, the username and the password.
The Hibernate configuration controls how it manages the database schema (update is commonly used because updates the database schema automatically, without deleting data), and we want to see how the queries are generated in the logs.
If you need help with this type of properties files, we have a tutorial here.
After all the configurations are done, we need to move on to the coding part.
We want to create a basic REST API that serves the Lemonade resource to our clients. To store the data in a new database, we want to create a new table with 3 columns: id, name, description. We don’t need to worry about the creation, Hibernate will handle this for us.
Instead, we need to define the Lemonade entity and we need to connect the fields of our class to the table. We will use some annotations for that:
					@Entity
@Table(name = "lemonades")
public class Lemonade {

    @Id
    @GeneratedValue(strategy = GenerationType.IDENTITY)
    private Long id;

    private String name;

    private String description;

    // getters and setters
}
The next step is to create the rest of the application using a multi-layer architecture: LemonadeRepository, LemondeService and LemonadeController.
Spring Data comes with an already created repository which can be used: JpaRepository. It is an interface in Spring Data JPA that provides CRUD (Create, Read, Update, Delete) operations and additional JPA-specific methods for working with relational databases.
					public interface LemonadeRepository extends JpaRepository<Lemonade, Long> {

}
The LemonadeRepository needs to be used in a new service class:
					@Service
public class LemonadeService {

    @Autowired
    private LemonadeRepository lemonadeRepository;

    public List<Lemonade> getAllLemonades() {
        return lemonadeRepository.findAll();
    }

    public Lemonade saveLemonade(Lemonade lemonade) {
        return lemonadeRepository.save(lemonade);
    }
And finally, we need to create the controller to define our endpoints:
					@RestController
@RequestMapping("/api/lemonades")
public class LemonadeController {

    @Autowired
    private LemonadeService lemonadeService;

    @GetMapping
    public List<Lemonade> getAllLemonades() {
        return lemonadeService.getAllLemonades();
    }

    @PostMapping
    public Lemonade addLemonade(@RequestBody Lemonade lemonade) {
        return lemonadeService.saveLemonade(lemonade);
    }
}
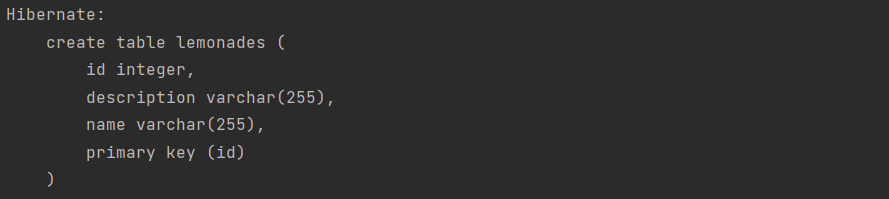
When we start our application, we can see the Spring Boot logs and additionally, we can see the logs provided by Hibernate. At the first start, the database and the table is created:
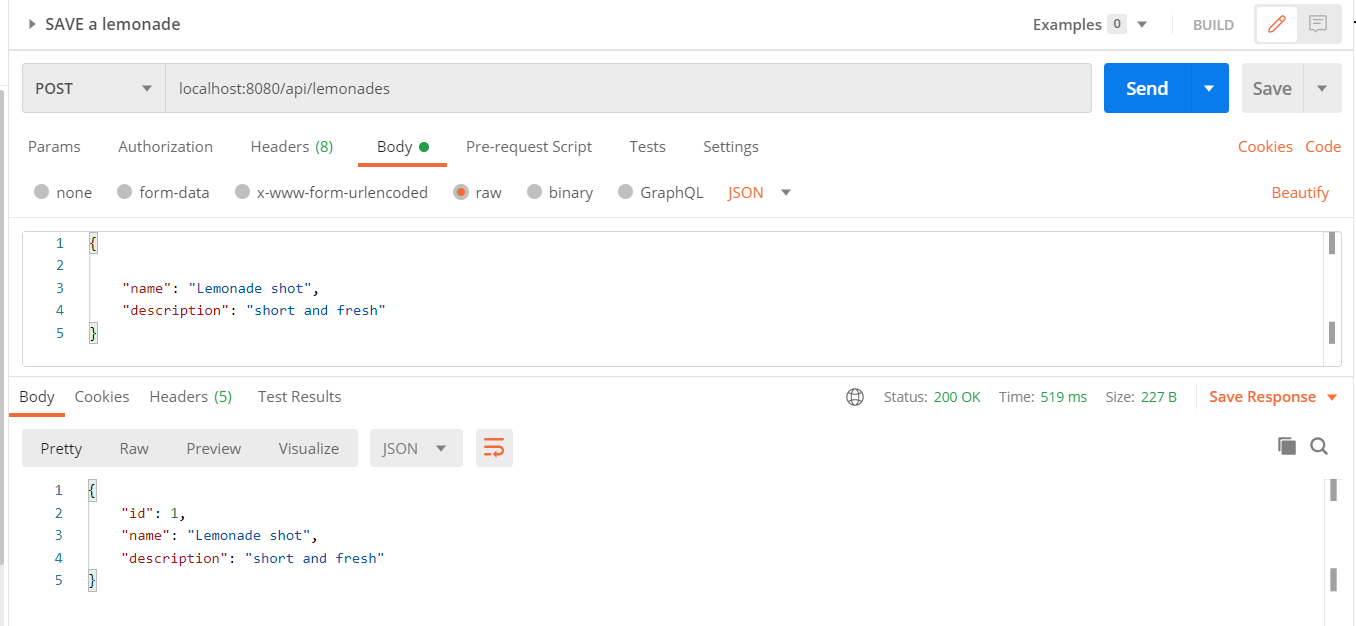
When we are creating a new entity, we don’t need to pass the id anymore, because Hibernate handles the auto-generation. We can test our application using Postman:
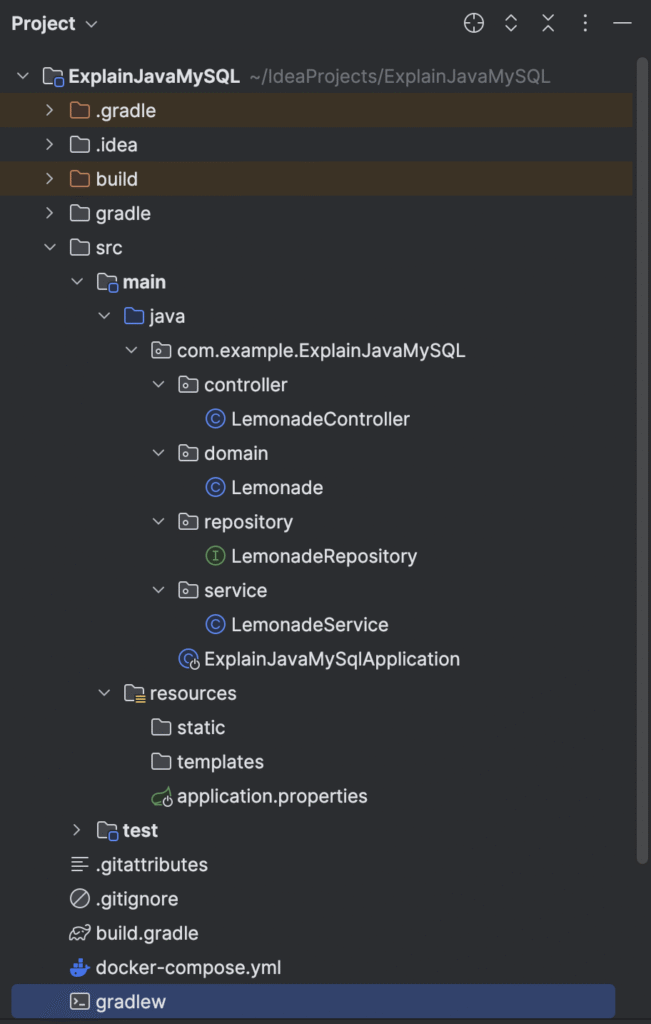
The final structure of our project will look like in the following image:
In this tutorial, we discovered how to create a Docker Container to install a database server and how to connect it to a Spring Boot Rest API.
Learn advanced concepts, work on real-world projects, and fast-track your journey to becoming a proficient Java developer. Start now and unlock your full potential in the world of Java programming!
Start now and unlock your full potential in the world of Java programming!

The place where you can start your Java journey.
© All Rights Reserved.