In this tutorial, we will learn how to add sorting to a REST API data-fetching endpoint using Spring Data’s JPA Repository.
In the previous tutorial, we created a new REST API project using Spring Boot and Spring Data. We set up an SQLite database with a single table to store our lemonades. To ensure efficiency, we implemented a pagination method to fetch data for our clients.
The following endpoint signature retrieves a page of lemonades containing 10 elements:
GET /api/lemonades?page=0&size=10
When designing a REST API, it is a best practice to include sorting capabilities, as it allows clients to retrieve data in an ordered manner. Additionally, sorting at the database level improves performance and reduces unnecessary data processing on the client side.
To achieve this, our endpoint will have the following signature:
GET http://localhost:8080/api/lemonades?page=0&size=5&sortBy=name&sortDir=desc
You can use Spring Initializr to quickly generate a Spring Boot project with Maven or Gradle. We can use the following configurations:

You will receive a ready-to-use project. All the configurations are already written in the build.gradle file and the start ExplainjavaRestApiApplication class is already created.
Additionally, we also have an already created structure in the resources folder and a test package.
The next step is to add two additional dependencies in the build.gradle file for the SQLite database connection:
The build.gradle file should look like this:
					plugins {
	id 'java'
	id 'org.springframework.boot' version '3.4.1'
	id 'io.spring.dependency-management' version '1.1.7'
}

group = 'com.example'
version = '0.0.1-SNAPSHOT'

java {
	toolchain {
		languageVersion = JavaLanguageVersion.of(17)
	}
}

repositories {
	mavenCentral()
}

dependencies {
	implementation 'org.springframework.boot:spring-boot-starter-data-jpa'
	implementation 'org.springframework.boot:spring-boot-starter-web'
	implementation 'org.hibernate.orm:hibernate-community-dialects:6.6.4.Final'
	runtimeOnly 'org.xerial:sqlite-jdbc'
}
After all the dependencies are ready to go, we need to tell Spring Data additional information about our database connection. For that, we need to add a application.properties file and add some basic configurations.
					spring.application.name=explainJavaSpringData

# Database configuration:
spring.datasource.url=jdbc:sqlite:database.db
spring.datasource.driverClassName=org.sqlite.JDBC
spring.datasource.username=
spring.datasource.password=

# Hibernate configuration:
spring.jpa.database-platform=org.hibernate.community.dialect.SQLiteDialect
spring.jpa.hibernate.ddl-auto=update
spring.jpa.properties.hibernate.format_sql=true
spring.jpa.show-sql=true
The next step is to create the main entity: Lemonade.
					@Entity
@Table(name = "lemonades")
public class Lemonade {

    @Id
    @GeneratedValue(strategy = GenerationType.IDENTITY)
    private Long id;

    private String name;

    private String description;

    // getters and setters
}
Then, we can create the rest of the application using a multi-layer architecture: LemonadeRepository, LemondeService and LemonadeController.
Spring Data comes with an already created repository which can be used: JpaRepository. It is an interface in Spring Data JPA that provides CRUD (Create, Read, Update, Delete) operations and some methods used for sorting and paging.
					public interface LemonadeRepository extends JpaRepository<Lemonade, Long> {

}
The LemonadeRepository needs to be used in a new service class:
					@Service
public class LemonadeService {

    @Autowired
    private LemonadeRepository lemonadeRepository;

     public Page<Lemonade> getAllLemonades(int page, int size, String sortBy, String sortDir) {
        Sort sort = sortDir.equalsIgnoreCase("desc") ? Sort.by(sortBy).descending() : Sort.by(sortBy).ascending();
        Pageable pageable = PageRequest.of(page, size, sort);
        return lemonadeRepository.findAll(pageable);
    }

    public Lemonade saveLemonade(Lemonade lemonade) {
        return lemonadeRepository.save(lemonade);
    }

}
As you can see, we created a Sort object using the Strings we receive as parameters.
And finally, we need to create the controller to define our endpoints:
					@RestController
@RequestMapping("/api/lemonades")
public class LemonadeController {

    @Autowired
    private LemonadeService lemonadeService;

    @GetMapping
    public Page<Lemonade> getAllLemonades(
            @RequestParam(defaultValue = "0") int page,
            @RequestParam(defaultValue = "5") int size,
            @RequestParam(defaultValue = "id") String sortBy,
            @RequestParam(defaultValue = "asc") String sortDir) {
        return lemonadeService.getAllLemonades(page, size, sortBy, sortDir);
    }


    @PostMapping
    public Lemonade addLemonade(@RequestBody Lemonade lemonade) {
        return lemonadeService.saveLemonade(lemonade);
    }
}
That’s it. We can start the application using the command bootRun and we can test our application using Postman.
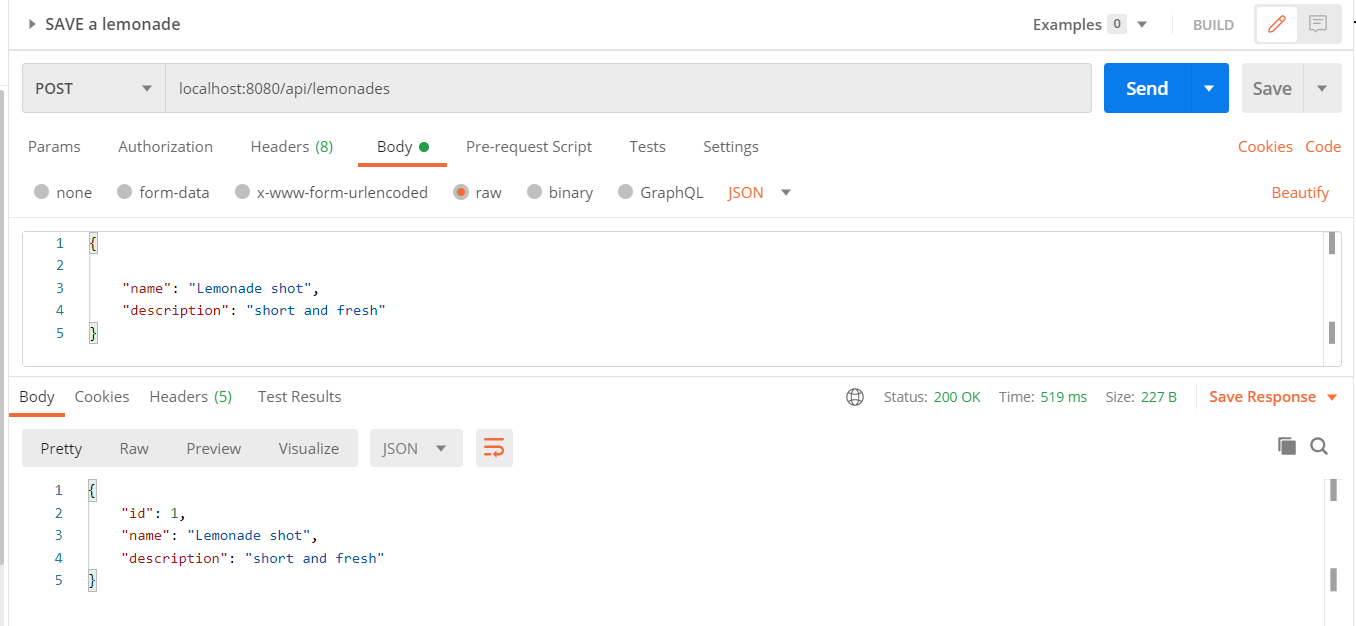
First, we can add some lemonades using POST method. Because we want to test the pagination, we can add 10.
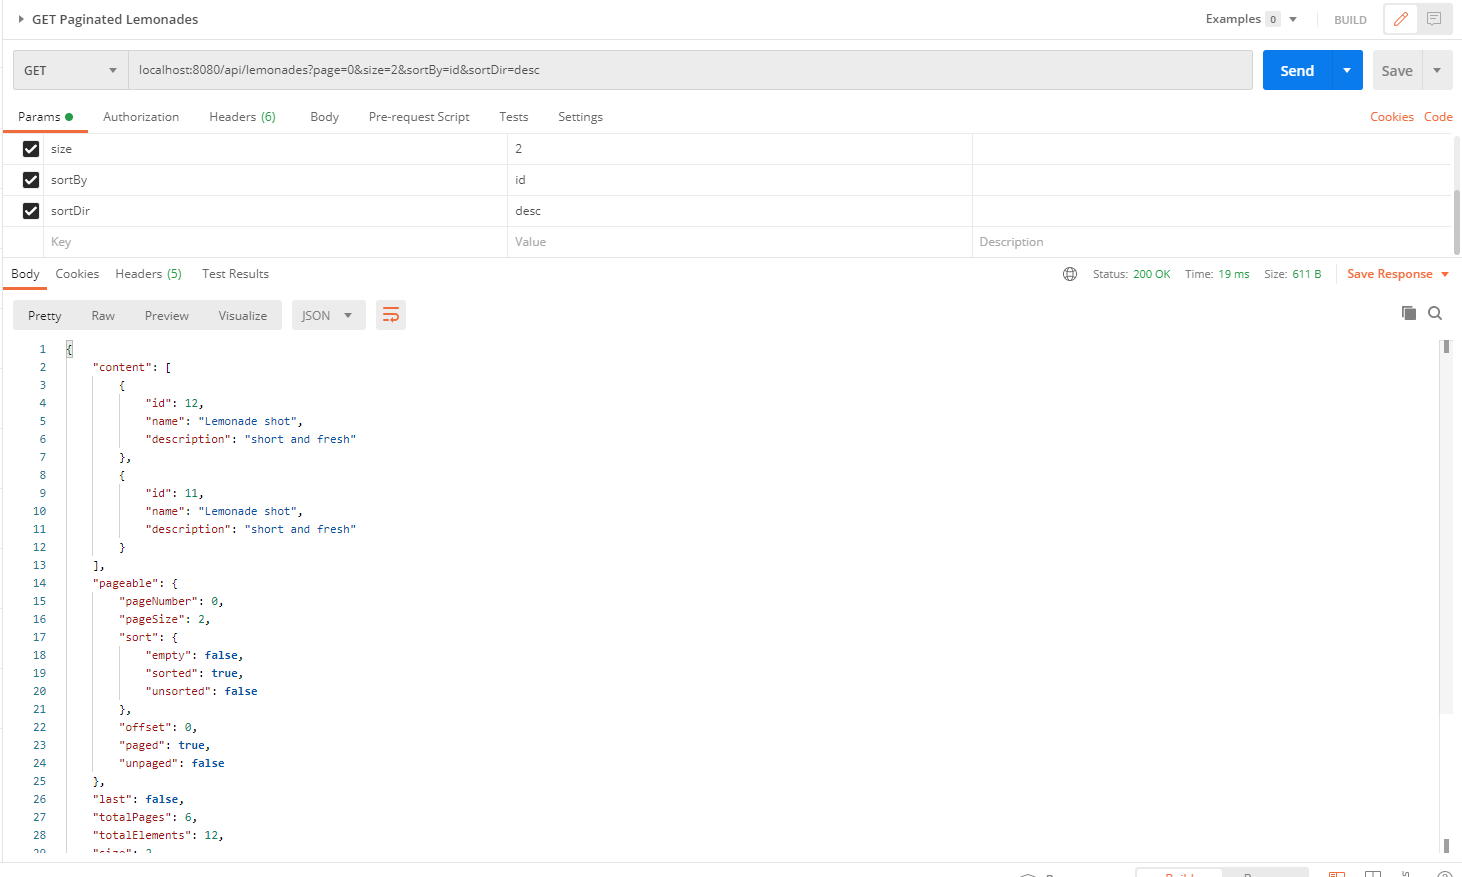
Next, we need to call the GET http method. You can check in the following image that we need to pass the page, the desired size, the sortBy and sortDir fields. We will receive only a subset of our data, sorted descending by id:
In this tutorial, we had an example of how to add sorting to a REST API data-fetching endpoint, using Spring Data’s JPA Repository.
Learn advanced concepts, work on real-world projects, and fast-track your journey to becoming a proficient Java developer. Start now and unlock your full potential in the world of Java programming!
Start now and unlock your full potential in the world of Java programming!

The place where you can start your Java journey.
© All Rights Reserved.