In this tutorial, we will have a step by step example of using @Query annotation in Spring Data’s JPA Repository.
Spring Data is a Spring Framework project that simplifies data access and persistence in Java applications. It provides a consistent, high-level abstraction for working with various databases, including relational databases, NoSQL databases, and other data stores.
The main benefits of Spring Data are:
In Spring Data JPA, you can define query methods in your repository interfaces just by following a naming convention. Spring Data JPA automatically generates the necessary SQL queries based on the method name. Using named queries is a valid approach and works well when dealing with a small number of queries.
However, since these queries are tied directly to the Java methods that execute them, it’s often more convenient to define them using Spring Data JPA’s @Query annotation. This keeps persistence logic out of the domain class and places the query alongside the repository method, making your codebase cleaner and more maintainable.
Also we can use @NativeQuery annotation which allows running native queries, as we will see in our example.
In the next part of our tutorial we will create a new REST API example using Spring Boot and SQLite database to see how to use @Query annotation to receive data from the database.
You can use Spring Initializr to quickly generate a Spring Boot project with Maven or Gradle. We can use the following configurations:

You will receive a ready-to-use project. All the configurations are already written in the build.gradle file and the start ExplainjavaRestApiApplication class is already created.
Additionally, we also have an already created structure in the resources folder and a test package.
The next step is to add two additional dependencies in the build.gradle file for the SQLite database connection:
The build.gradle file should look like this:
					plugins {
	id 'java'
	id 'org.springframework.boot' version '3.4.1'
	id 'io.spring.dependency-management' version '1.1.7'
}

group = 'com.example'
version = '0.0.1-SNAPSHOT'

java {
	toolchain {
		languageVersion = JavaLanguageVersion.of(17)
	}
}

repositories {
	mavenCentral()
}

dependencies {
	implementation 'org.springframework.boot:spring-boot-starter-data-jpa'
	implementation 'org.springframework.boot:spring-boot-starter-web'
	implementation 'org.hibernate.orm:hibernate-community-dialects:6.6.4.Final'
	runtimeOnly 'org.xerial:sqlite-jdbc'
}
After all the dependencies are ready to go, we need to tell Spring Data additional information about our database connection. For that, we need to add a application.properties file and add some basic configurations.
					spring.application.name=explainJavaSpringData

# Database configuration:
spring.datasource.url=jdbc:sqlite:database.db
spring.datasource.driverClassName=org.sqlite.JDBC
spring.datasource.username=
spring.datasource.password=

# Hibernate configuration:
spring.jpa.database-platform=org.hibernate.community.dialect.SQLiteDialect
spring.jpa.hibernate.ddl-auto=update
spring.jpa.properties.hibernate.format_sql=true
spring.jpa.show-sql=true
The next step is to create the main entity: Lemonade.
					@Entity
@Table(name = "lemonade")
public class Lemonade {

    @Id
    @GeneratedValue(strategy = GenerationType.IDENTITY)
    private Long id;

    private String name;

    private String description;

    // getters and setters
}
Then, we can create the rest of the application using a multi-layer architecture: LemonadeRepository, LemondeService and LemonadeController.
Spring Data comes with an already created repository which can be used: JpaRepository. It is an interface in Spring Data JPA that provides CRUD (Create, Read, Update, Delete) operations and some other methods used for sorting and paging.
					public interface LemonadeRepository extends JpaRepository<Lemonade, Long> {

    @Query("select l from Lemonade l where l.name = ?1 ")
    List<Lemonade> findByName(String name);

    @Query("select l from Lemonade l where lower(l.description) like LOWER(CONCAT('%', " +
            ":description, '%'))")
    List<Lemonade> findByDescriptionContainingIgnoreCase(String description);

    @NativeQuery("select count(*) from lemonade l where l.name = ?1 ")
    Long countByName(String name);

}
The LemonadeRepository needs to be used in a new service class:
					@Service
public class LemonadeService {

    @Autowired
    private LemonadeRepository lemonadeRepository;

    public Lemonade saveLemonade(Lemonade lemonade) {
        return lemonadeRepository.save(lemonade);
    }

    public List<Lemonade> getLemonadesByName(String name) {
        return lemonadeRepository.findByName(name);
    }

    public List<Lemonade> searchLemonadesByDescription(String description) {
        return lemonadeRepository.findByDescriptionContainingIgnoreCase(description);
    }

    public Long countByName(String name) {
        return lemonadeRepository.countByName(name);
    }
}
And finally, we need to create the controller to define our endpoints:
					@RestController
@RequestMapping("/api/lemonades")
public class LemonadeController {

    @Autowired
    private LemonadeService lemonadeService;

    @PostMapping
    public Lemonade addLemonade(@RequestBody Lemonade lemonade) {
        return lemonadeService.saveLemonade(lemonade);
    }

    @GetMapping
    public List<Lemonade> getLemonadesByName(@RequestParam String name) {
        return lemonadeService.getLemonadesByName(name);
    }

    @GetMapping("/search")
    public List<Lemonade> searchLemonadesByDescription(@RequestParam String description) {
        return lemonadeService.searchLemonadesByDescription(description);
    }

    @GetMapping("/count")
    public Long countByName(@RequestParam String name) {
        return lemonadeService.countByName(name);
    }

}
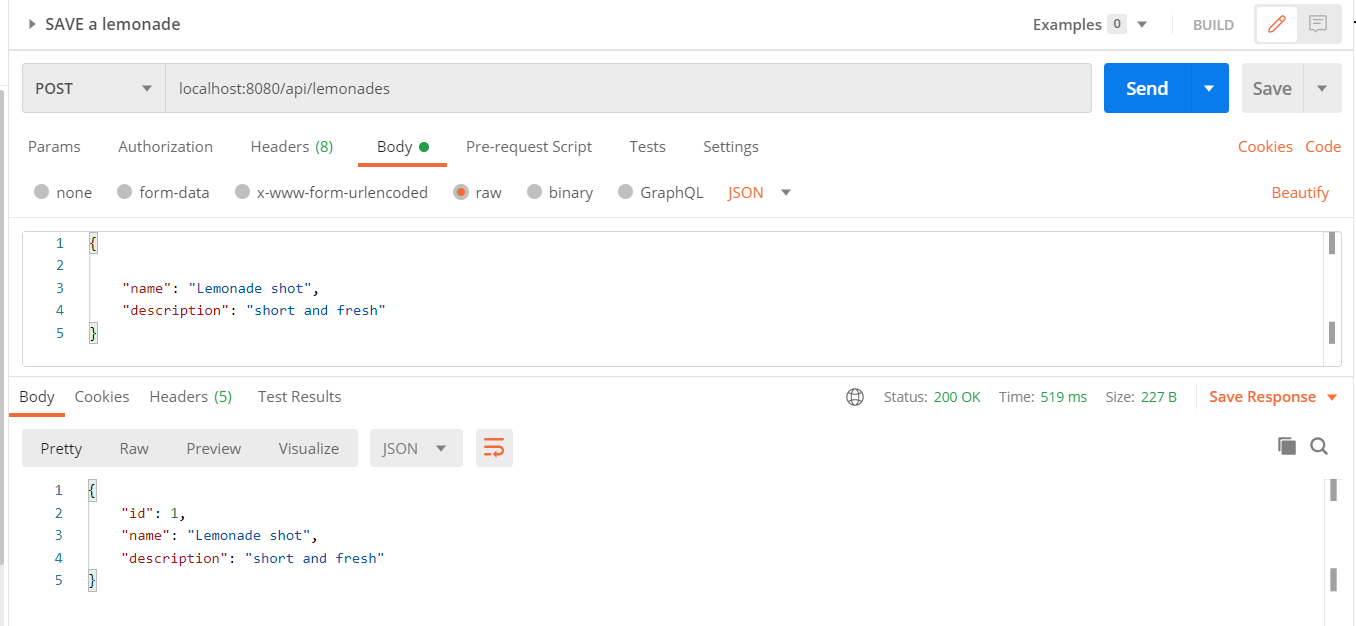
That’s it. We can start the application using the command bootRun and we can test our application using Postman.
First, we can add some lemonades using POST method.

Next, we need to call the GET http method. We defined the following endpoints:


In this tutorial, we had an example of how to use @Query annotation in our JPA repository that is used in a simple REST API.
Learn advanced concepts, work on real-world projects, and fast-track your journey to becoming a proficient Java developer. Start now and unlock your full potential in the world of Java programming!
Start now and unlock your full potential in the world of Java programming!


The place where you can start your Java journey.
© All Rights Reserved.