In this tutorial we will discover how to handle properties in a Spring Boot application with some practical examples.
In the Spring Boot ecosystem, application properties are a set of configuration parameters used to customize the behavior of the application. These properties are typically defined in a file named application.properties or application.yml (YAML format) in the src/main/resources directory.
Spring Boot provides a set of predefined properties that can be modified, or you can define your own custom properties. For example, you can configure the port where the embedded Tomcat server runs, specify log levels, set up database configurations, and much more. A list with common properties can be found here.
Spring Boot automatically binds these properties to fields, classes, and beans within the application. In the case of custom properties, you can use them to enable or configure specific features or to parameterize your application with various values.
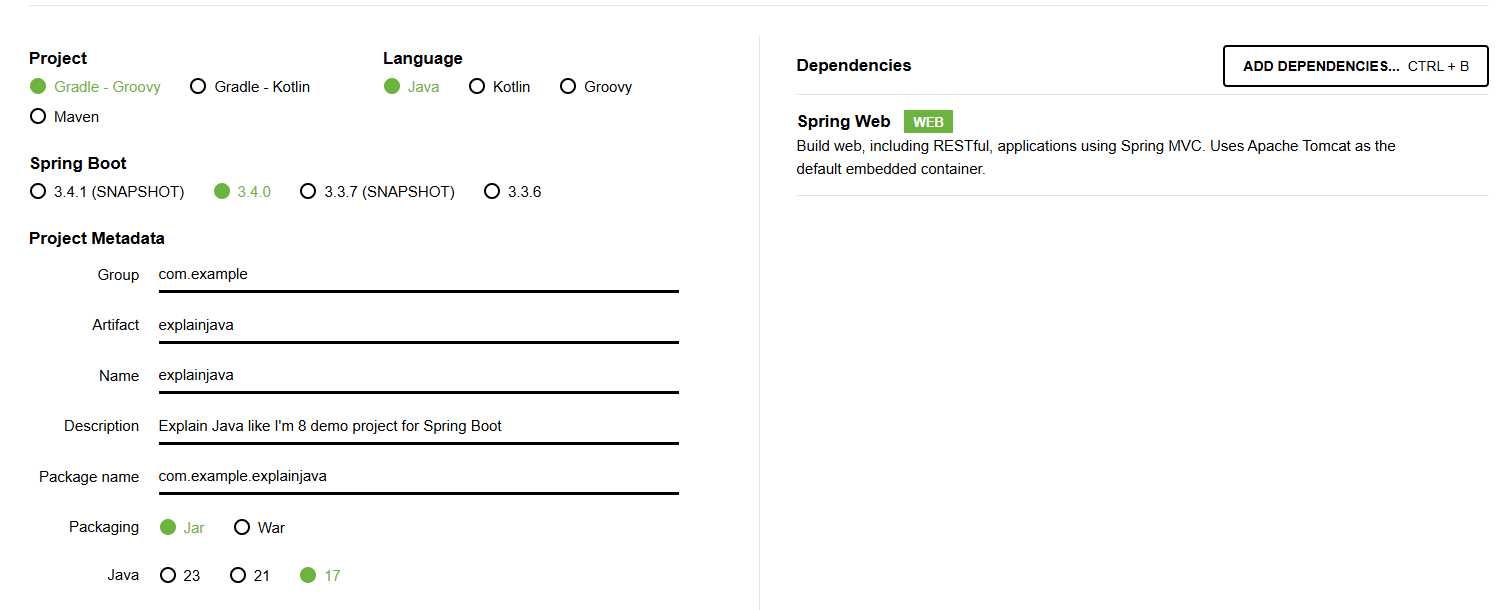
You can use Spring Initializr to quickly generate a Spring Boot project with Maven or Gradle. We can use the following configurations:

You will receive a ready-to-use project. All the configurations are already written in the build.gradle file and the start ExplainjavaApplication class is already created.
Additionally, we also have an already created structure in the resources folder and a test package.

Let’s try to modify the application.properties file:
					spring.application.name=explainjava

server.port=8090

explainjava.feature.enabled=true
explainjava.api.endpoint=https://api.example.com
In this example, Spring Boot will automatically detect that we want to change the server’s port and when we start the application the change is made without any other intervention.
For the last two properties, we can use the @Value annotation to access the value:
					@SpringBootApplication
public class ExplainjavaApplication implements CommandLineRunner {

	@Value("${explainjava.feature.enabled}")
	private Boolean featureEnabled;

	@Value("${explainjava.api.endpoint}")
	private String apiEndpoint;

	@Override
	public void run(String[] args) throws Exception {
		System.out.printf("The custom values are: %b, and %s", featureEnabled, apiEndpoint);
	}

	public static void main(String[] args) {
		SpringApplication.run(ExplainjavaApplication .class, args);
	}
}
Now, when we start the server using bootRun command, we can see that the following lines are printed:
					...
Tomcat initialized with port 8090 (http)
...
The custom values are: true, and https://api.example.com
...
In this tutorial, we had some basic examples of using application properties file in a Spring Boot application.
Learn advanced concepts, work on real-world projects, and fast-track your journey to becoming a proficient Java developer. Start now and unlock your full potential in the world of Java programming!
Start now and unlock your full potential in the world of Java programming!


The place where you can start your Java journey.
© All Rights Reserved.